Good Quality Attribute Fixture - Car auto body parts of front bumper Checking Fixture – TTM
Good Quality Attribute Fixture - Car auto body parts of front bumper Checking Fixture – TTM Detail:
Function
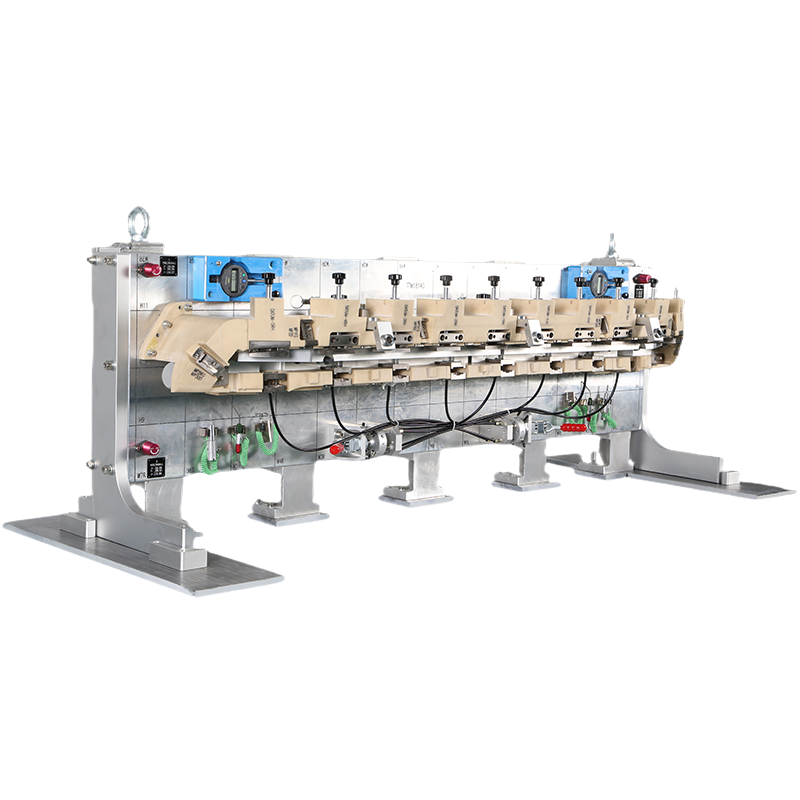
For Front Bumper quality inspection control and support to improve the automotive production line capacity rate
Specification
|
Fixture Type: |
Checking Fixture for Front Bumper |
|
Size: |
1480*360*600 |
|
Weight: |
127KG |
|
Material: |
Main Construction: metal Support: metal |
|
Surface treatment: |
Base Plate: Electroplating Chromium and Black Anodized |
Product Details
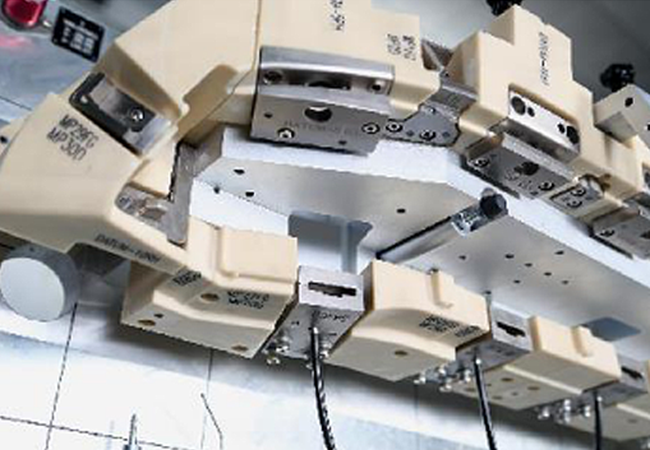

Detailed Introduction
The inspection tool plays the role of supporting the whole inspection tool and is the foundation of the inspection tool. Firm, stable is its basic requirement. It also plays the role of carrying the mobile inspection fixture. Large inspection tools are generally cast as a whole skeleton and base, requiring a mobile roller to be installed in each of the four corners, so the complete “foundation” includes the bottom plate, the skeleton and the roller, among which the bottom plate is indispensable. Smaller inspection tools are also useful steel pipe welded into the honing frame, light and handy. Additional REQUIREMENTS – Spring washers of sufficient strength must be provided for all types of bolted connections to the base plate.
The frame of the fixture can be in the form of split column if it is used only for the inspection of assembly parts. The connection with the bottom plate adopts the screw skeleton and the base is generally made of aluminum alloy with high machining accuracy. Shanghai Volkswagen usually recommends domestic: GBZL101. The material must go through the heat treatment process such as stress removal: the small gauge adopts aluminum alloy base plate.
It can also be divided into detection parts (such as functional surface) and non-detection parts (such as non-functional surface). Automotive interior and exterior trim parts, especially plastic parts, have complex space surface and more local features, poor rigidity and other characteristics, resulting in positioning, supporting and clamping are difficult, so the design of the shape part of the tool is very important. After the design of the tool body part is completed, the position and size of the bottom assembly are determined according to the tool body, and the shape card is set in the key section to be tested.
For the material of the type body part, the large tester should adopt the resin material (engineering plastic) which can be processed, and the small tester can use aluminum alloy.
Key points of fixture design.
Before designing the inspection tool, be sure to carefully study the product drawings, “understand thoroughly” the size and matching requirements of the parts, if possible, carefully examine the samples and sample cars, and the internal structure of the inspected parts and their external coordination relations — first, to achieve a clear understanding of the heart. The structure of modern measuring tool should be fully considered in the design of its use as a measuring support (measuring support is a kind of auxiliary support when measuring parts with coordinate measuring machine), combining measuring tool and measuring support into one, which can effectively save manufacturing cost.
In principle, the position of the detected part placed on the tool should be consistent with its position in the body coordinate system, and the dimension reference should be placed in the body coordinate system. Ensure that the reference plane and reference hole on the base can be easily used to establish the reference coordinate system which is consistent with the body coordinate system, that is, the coordinates marked by the reference plane/hole are the values in the body coordinate system. The body and bottom plate of the tool shall be marked every 100mm in X, Y and Z directions.
A good tool designer should be able to summarize and understand. To make an analogy, no matter it is a measuring bracket or a narrow measuring instrument, to a certain extent, their structural design is similar to Chinese calligraphy. Chinese calligraphy pays attention to white cloth, proper thickness, well-scattered, symmetrical, left and right balance, overall coordination, overall beauty. This should also be the case when designing the fixture.automotive parts in production, ensures the safety and processing speed of automotive assembly, and improves the quality of automotive parts.
The Working Flow
1. Received the purchasing order -——-> 2. Design -——-> 3. Confirming the drawing/solutions -——-> 4. Prepare the materials -——-> 5. CNC -——-> 6. CMM -——-> 6. Assembling -——-> 7. CMM-> 8. Inspection -——-> 9. (3rd part inspection if need) -——-> 10. (internal/customer on site) -——-> 11. Packing(wooden box) -——-> 12. Delivery
Manufacturing Tolerance
1. The Flatness of Base Plate 0.05/1000
2. The Thickness of Base Plate ±0.05mm
3. The Location Datum ±0.02mm
4. The Surface ±0.1mm
5. The Checking Pins and Holes ±0.05mm
Product detail pictures:


Related Product Guide:
While using the "Client-Oriented" organization philosophy, a rigorous top quality command process, highly developed production devices and a potent R&D workforce, we normally provide high quality products, outstanding solutions and aggressive charges for Good Quality Attribute Fixture - Car auto body parts of front bumper Checking Fixture – TTM , The product will supply to all over the world, such as: Madagascar, Manchester, Irish, With the aim of "compete with good quality and develop with creativity" and the service principle of "take customers' demand as orientation", we will earnestly provide qualified products and good service for domestic and international customers.
This company has the idea of "better quality, lower processing costs, prices are more reasonable", so they have competitive product quality and price, that's the main reason we chose to cooperate.

1.png)

.png)
.png)