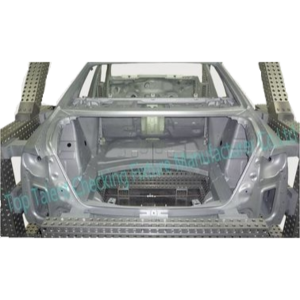
Automotive Biw Manufacturing Process , Vehicle Function Checking Fixture Components
Video
|
Base: |
Al |
Color: |
Original Color Of Mental |
|
Body: |
Al |
Certification: |
ISO 9001 2008 Certification |
|
Gauge: |
BIW Checking Fixtures |
Effect: |
Checking Vehicle Function |
Automotive BIW specialty customized Checking Fixtures
DETAILED INTRODUCTION
1. Check the plug gauge surface before use, and there should be no rust, scratches, dark spots, etc.; signs of plug regulations should be correct and clear.
2.The standard conditions for plug gauge measurement are: temperature is 20°C, and force measurement is 0. It is difficult to meet this requirement in practical use. In order to reduce the measurement error, try to use the plug gauge and the device under test to measure under isothermal conditions. Use a force that is as small as possible. Do not push the plug gauge into the hole or push it sideways.
3.When measuring, the plug gauge should be inserted or pulled out along the axis of the hole, and should not be tilted; plug gauges should be inserted into the hole, and it is not allowed to turn or shake the plug gauge.
4.It is not allowed to use plug gauges to detect unclean workpieces.
5.The plug gauge is one of the precision measuring instruments. It should be handled with care and must not touch the working surface.
6.Plug gauges should be cleaned with a clean soft cloth or fine cotton yarn immediately after each use, coated with a thin layer of anti-rust oil, into a special box, dry place storage
Seventh, the plug regulations should be subject to periodic verification. The verification period shall be determined by the measurement department.
When used, the correct operation of the gauge can be summarized as "light", "positive", "cold", "full".
Light: Handle gently, securely and steadily; do not throw at random; do not collide with the workpiece, check after the workpiece is stable; check to lightly plug the light card, not hard card hard plug.
Positive: The position must be placed positively, and it cannot be skewed, otherwise the test result will not be reliable.
Cold: The inspection can only be carried out when the workpiece to be inspected is at the same temperature as the gauge. It is not possible to test the workpiece that has just been processed and is still hot. The precision workpiece should be isothermally measured with the gauge.
Full: Gauges are required to test the workpiece in order to obtain correct and reliable inspection results. The plug end must be inspected over the entire length of the hole and must be tested in 2 or 3 axial planes; It may be tested at both ends of the hole. Both the end of the caliper and the end of the caliper should be tested along the shaft and at no less than 4 positions around the shaft.
Primary Competitive Advantages
Pursuit Of Quality Excellence
Multiple Products & Services
Efficiency Consciousness-On-Time Delivery
Cost Consciousness-Innovative Design Solutions To Reduce The Cost
Timely Communication With Our Customer
Compliance With Cooperator’s Terms And Conditions
NDA(Non-disclosure Agreement)
Our purpose is that we can only succeed if our customers succeed.


.png)
.png)